
Start 12 Weeks Early: Assisted Living Downsizing and When to Hire Help
Senior focused room by room checklist to downsize for assisted living. Practical 12 and 6 week timelines, sorting rules, and when to hire professional help.

Start 12 Weeks Early: Assisted Living Downsizing and When to Hire Help
Start by calling the assisted living community for the unit floor plan and measurements, then sort every room using a keep, donate, sell, or store system while packing a first-night box of essentials. A successful move looks calm, not chaotic: furniture that fits without blocking walkways, documents on hand instead of buried on a truck, and a first week built around familiar routines instead of scattered boxes.
TL;DR:
- Furniture measurements and room planning are crucial to prevent overcrowding and fall hazards in the new assisted living space.
- Starting downsizing six to twelve weeks early allows ample time for decision-making, sorting, and coordinating logistics without rushing.
- Prioritize packing an “open first” box with essentials like medications and toiletries to ease move-in day chaos.
- Use a keep, donate, sell, store system for room-by-room sorting with a clear deadline to prevent indefinite indecision.
- Professional help should be considered for moves under six weeks, physical limitations, or significant disagreements over belongings.
Table of Contents
- Downsizing for Assisted Living: The Priority Checklist
- Planning the Timeline: 12-Week, 6-Week, and Urgent Schedules
- Measuring the New Unit Before You Choose Furniture
- The Keep, Donate, Sell, Store Sorting Method
- Documents, Valuables, and Digitizing Before the Move
- Packing the First-Night and First-Week Boxes
- Handling Sentimental Items Without the Guilt
- Choosing Between Selling, Donating, and Storing
- When to Bring in Professional Help
- Move-Day Checklist and Common Problems
- Settling in During the First Week
- A Personal Note on Downsizing With Dignity
- How Ohana Can Help With the Heavy Lifting
- Trusted Resources for Downsizing Seniors
- Sources
Downsizing for Assisted Living: The Priority Checklist
Before anything else, three tasks set the tone for the entire move. Call the community for the unit’s floor plan and measurements, start a room-by-room sort using a sorting system, and gather critical paperwork before it disappears into packing boxes.
- Request the floor plan and confirm move-in rules (elevator access, moving hours, furniture restrictions)
- Sort each room into keep, donate, sell, or store
- Pull medical records, IDs, and a medication list into one folder
- Schedule the movers or property cleanout help at least three weeks out
- Pack an open-first box before moving day to have essentials ready
| Priority | Task | Why it matters first |
|---|---|---|
| 1 | Get floor plan and measurements | Prevents buying or keeping furniture that won’t fit |
| 2 | Sort room-by-room | Reduces decision fatigue over weeks, not days |
| 3 | Gather documents and medications | Avoids frantic searching on move day |
Planning the Timeline: 12-Week, 6-Week, and Urgent Schedules
Downsizing works best when it starts six to twelve weeks before the move. That window gives everyone room to make decisions without rushing, and it gives family members a real role instead of a last-minute scramble.
- Weeks 12 to 9: Request the floor plan, measure rooms and furniture, and begin sorting low-stakes categories like linens and kitchen duplicates.
- Weeks 8 to 5: Tackle clothing, paperwork, and collections. Assign one family member as decision-maker, one as the “runner” for donation drop-offs, and one to manage documents.
- Weeks 4 to 2: Schedule sale or donation pickups, confirm movers, and pack everything except daily essentials.
- Final week: Pack the open-first box, confirm community move-in rules, and finalize address changes.
A 6-week compressed plan skips ahead to sorting and documents immediately, often running two sorting sessions per week instead of one. For an urgent move under two weeks, hand off packing and hauling entirely to a move manager or full-service cleanout provider so the family can focus on decisions, not logistics.
Measuring the New Unit Before You Choose Furniture
Getting the floor plan first isn’t optional. It’s the single step that prevents the most common downsizing mistake: keeping furniture that overcrowds the new space and creates fall hazards along walkways.
Once you have the floor plan, measure your favorite chair, dresser, and bed before deciding anything. Then sketch or tape out the new room’s dimensions at home and physically test whether pieces fit with a clear three-foot path to the bathroom and door.
- Measure doorways and hallways in the new unit, not just the room itself
- Choose one comfortable chair over two, and a smaller dresser over a full bedroom set
- Favor multi-use furniture: a nightstand with drawers, a bench that opens for storage
- Leave at least 36 inches of clear walking path between furniture
Pro Tip: Tape the new room’s exact dimensions on your current living room floor with painter’s tape. Standing inside those lines makes “will it fit” a lot less abstract than a tape measure alone.
The Keep, Donate, Sell, Store Sorting Method
Work one room at a time, and keep sessions short. Two hours per sorting session tends to build momentum without triggering burnout, especially early on.
- Keep: Daily-use items and pieces that fit the new floor plan (a favorite mug, a reading lamp)
- Donate: Duplicate kitchenware, clothes unworn in a year, extra linens
- Sell: Furniture, jewelry, or collectibles with real resale value
- Store: Seasonal items or family heirlooms not yet decided on
- Undecided: A dedicated box for anything that stalls the process
The one-year rule works well here: if it hasn’t been used or worn in twelve months, it’s a strong donate candidate. Ask “could I replace this easily?” for anything borderline. If yes, let it go.
Pro Tip: Set a re-evaluation date for the undecided box to prevent indefinite delaying of decisions. A deadline prevents “I’ll decide later” from turning into “I never decided.”
Documents, Valuables, and Digitizing Before the Move
Legal and medical paperwork needs to travel with a person, not with the movers. Guides consistently recommend centralizing IDs, medication lists, advance directives, insurance cards, and emergency contacts into one folder well before move day.
- Photo ID, Social Security card, and Medicare/insurance cards
- Advance directive, power of attorney, and will
- Current medication list with dosages and prescribing doctors
- Bank and financial account information
Digitize photos and important papers early using a scanner app, then back them up in a secure cloud folder and share access with a trusted family member. This preserves decades of photos without a single extra box. Keep jewelry, cash, and small valuables in a bag carried by a family member during the move, never packed in a box on the truck.
Packing the First-Night and First-Week Boxes
The open-first box is what keeps move-in day from feeling like a scavenger hunt. Guides across the field agree it should hold everything needed for the first 24 hours without opening a single other box.
- Medications (carried separately, never in checked boxes or the moving truck)
- Toiletries, a change of clothes, and basic bedding
- Chargers, glasses, hearing aid batteries
- A few favorite photos or a familiar throw blanket
Label this box in bold letters, “OPEN FIRST,” and keep it in the car, not the truck. Pack a second “Week 1” box with clothes and pantry basics, labeled by room so movers place it correctly on arrival.
Handling Sentimental Items Without the Guilt
Reframing this process as curating a new, easier life instead of discarding an old one changes how sentimental decisions feel. Elder Care Alliance notes that this shift in language and mindset measurably improves how families experience the process.
- Build one memory box per person instead of keeping every item
- Photograph sentimental pieces that don’t fit before letting them go
- Set a family agreement in writing: who stores what, and for how long
- Distribute meaningful items to family now, while stories can be shared
Photographing items before parting with them preserves the memory without the physical space or cost of long-term storage.
Pro Tip: Ask each grandchild to choose one item with a story attached. It turns a hard goodbye into a small family tradition instead of a loss.

Choosing Between Selling, Donating, and Storing
Sell items only when the resale value genuinely outweighs the time and effort. A well-kept dining set or fine jewelry might justify consignment or an estate sale. Everyday furniture, kitchenware, and clothing usually move faster and easier through donation.
- Sell: Consignment shops, estate sale companies, or online marketplaces for higher-value pieces
- Donate: Local charities offering pickup service for furniture and household goods
- Store: Climate-controlled storage for heirlooms or seasonal items not yet decided on
Storage works best as a temporary bridge, not a permanent answer. Setting a re-evaluation date several months out forces a real decision instead of letting a storage unit quietly become another cluttered room. For space-saving between now and then, vacuum-sealed storage bags can shrink linens and seasonal clothing considerably.
When to Bring in Professional Help
Not every family has the time, physical stamina, or bandwidth to sort a lifetime of belongings alone. Caregiver: doing it yourself, hiring a senior move manager, or bringing in full-service help that combines a move manager, movers, and a cleanout crew.
- Sorting, packing, and unpacking at the new residence
- Donation routing to local charities
- Hauling and disposal of unwanted furniture and debris
- Full estate or property cleanouts when a home is also being sold
Consider professional help when the timeline is under six weeks, physical limitations make lifting or sorting difficult, or family members disagree on what stays and what goes. When vetting a provider, ask for a photo-based estimate, confirm insurance coverage, and ask how they handle donation routing.
A calm, well-organized transition rarely happens by accident. It happens because someone built in enough time, and enough help, to make hundreds of small decisions without rushing any of them.
Move-Day Checklist and Common Problems
- Confirm mover arrival time and the community’s loading dock or elevator rules the night before.
- Assign one family member to set up the bed and bathroom first, before anything else gets unpacked.
- Unpack the Week 1 box and open-first box immediately.
- Photograph each room once settled, for insurance and inventory purposes.
- Keep the community’s front desk or manager’s number handy for questions about move-in logistics.
If a piece of furniture doesn’t fit through a doorway or the truck runs late, don’t panic. Most communities have flexible check-in windows, and a quick call to the property manager usually solves oversized-item problems faster than trying to force a fix on the spot.
Settling in During the First Week
The first week matters more than most families expect. Small, familiar touches, family photos on a nightstand, a favorite blanket on the bed, do more to ease disorientation than a fully unpacked closet.
- Set out familiar photos and a favorite blanket before unpacking anything else
- Keep visits short and calm rather than long and overwhelming
- Confirm the pharmacy transfer, doctor contacts, and mail forwarding are active
- Set one regular call time with family so updates don’t require constant check-ins
- Put a reminder on the calendar to review stored items in six to twelve weeks
A Personal Note on Downsizing With Dignity
Helping a parent or spouse downsize is rarely just logistics. It’s watching someone decide what a smaller life should still contain. One habit worth keeping after the move: spend thirty minutes a week revisiting the undecided box. It turns one big overwhelming decision into a dozen small, manageable ones.
— Olga
How Ohana Can Help With the Heavy Lifting
Once the sorting is done, someone still has to haul away what’s left, and that’s where a lot of families run out of steam. A local cleanout provider can offer photo-based quotes, so you know the cost before a single box moves, and fast turnaround that fits a tight assisted living timeline instead of a weeks-long wait list.

Ohana’s full-service cleanout crews handle furniture removal, appliance removal, and debris hauling, with donation-conscious recovery routing usable items to local charities instead of the landfill. For families also preparing to sell or empty the home entirely, estate cleanout services cover the full property, not just the leftover boxes. If your family is in Central Indiana and facing a downsizing deadline, call (812) 302-6833 or request a free estimate through Ohana Property Services to get a same-week quote.
Trusted Resources for Downsizing Seniors
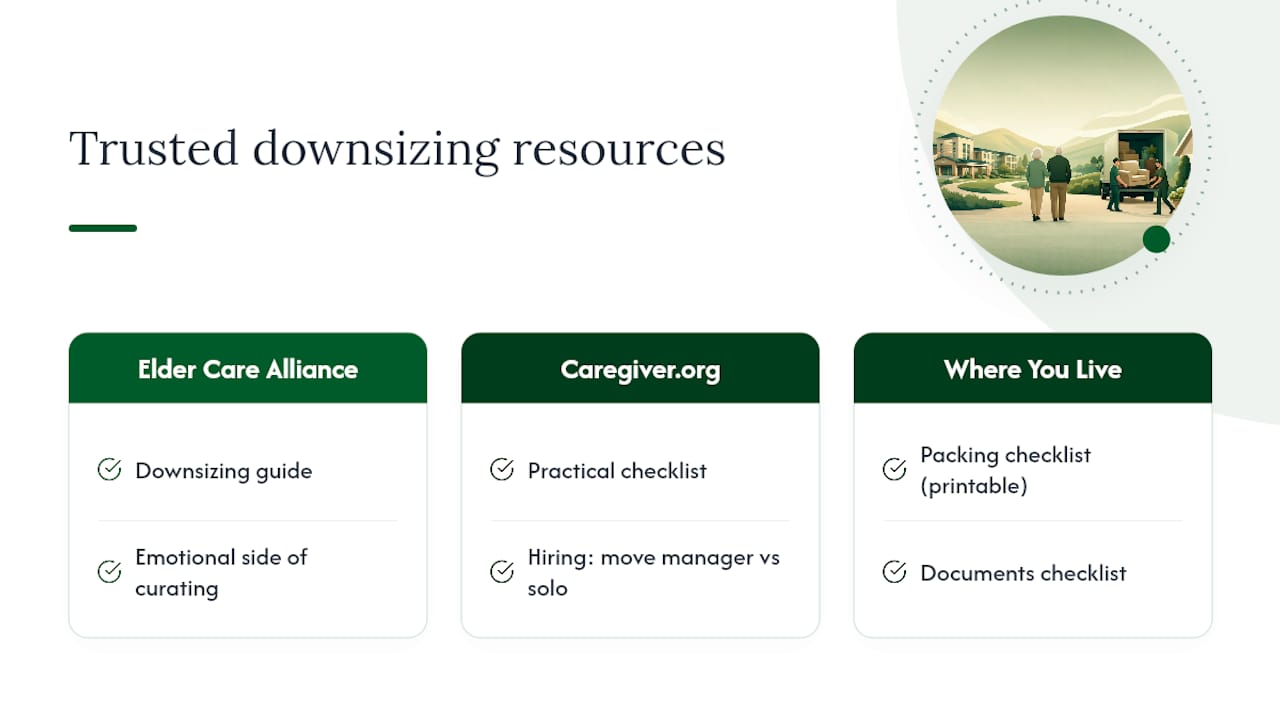
For deeper reading, Elder Care Alliance’s downsizing guide covers the emotional side of curating a new life. Caregiver.org’s checklist breaks down when to hire a move manager versus doing it solo. Where You Live Matters offers a practical packing and documents checklist worth printing out before week one begins.
Sources
- Downsizing for assisted living (Elder Care Alliance, 2026)
- 11 Downsizing Tips for Seniors Who Are Moving to Assisted Living - AgingCare
- Caregiver
- Downsizing checklist for seniors (Where You Live Matters)