
How to Document Property Condition After a Cleanout
Learn how to effectively document a property's condition post-cleanout. Capture essential evidence for disputes, sales, and insurance claims.
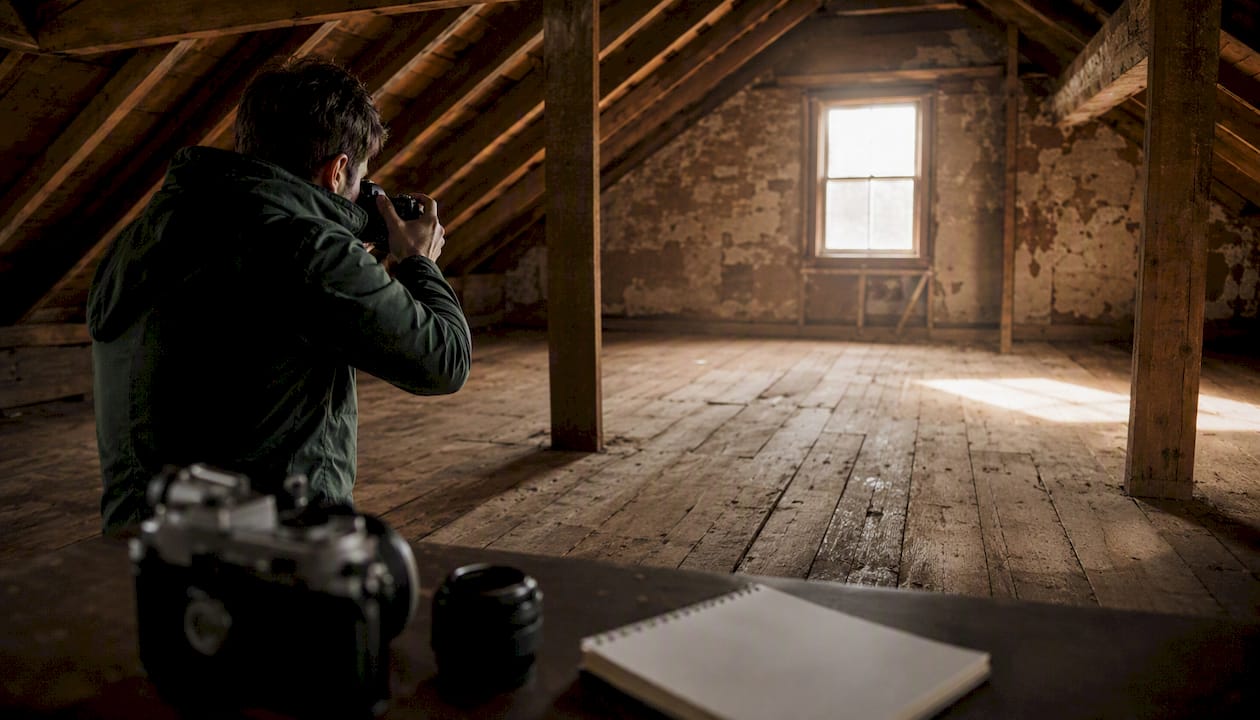
How to Document Property Condition After a Cleanout
A defensible post-cleanout record comes down to four things: dated, room-by-room photos and video, a signed condition checklist, haul and donation receipts, and a secure backup of everything. Get those four elements right, and you have admissible evidence that holds up for a sale, a security deposit dispute, a probate filing, or an insurance claim. Miss one, and you may find yourself arguing from memory against someone with a lawyer.
Here is the short version of what to do immediately after a cleanout:
- Photograph and video every room before anyone else enters, with your phone’s location services on so GPS metadata embeds automatically.
- Complete a signed condition checklist covering walls, floors, ceilings, appliances, fixtures, and major systems. Both the inspector and the property owner (or their representative) sign it.
- Collect haul receipts, weight tickets, and donation receipts from every contractor or charity that removed items from the property.
- Back up originals to at least two locations (cloud storage plus an external drive) the same day.
For a standard residential cleanout, that checklist-level inspection is usually enough. When the property is large, complex, or tied to a high-stakes financial transaction, a formal Property Condition Assessment (PCA) aligned with ASTM E2018 is the appropriate escalation. State security-deposit deadlines commonly require return or itemized deductions within a few weeks from move-out, so the clock starts the moment the cleanout ends. Ohanapropertyexperts can supply documentation-ready cleanouts in Central Indiana that include photo packs, signed reports, and haul manifests, so you leave the property with a complete record.
Key Takeaways
A defensible post-cleanout record requires dated photos with preserved metadata, a signed condition checklist, haul receipts, and a secure backup — all collected the same day the cleanout ends.
| Point | Details |
|---|---|
| Four core documents | Dated photos/video, signed condition checklist, haul/donation receipts, and a secure backup form the minimum defensible record. |
| Strongest evidence in disputes | Dated photos with original EXIF metadata, a signed condition report, and haul weight tickets carry the most weight in deposit disputes and legal proceedings. |
| Retention period | Keep records for the lease term plus 3–6 years, or through probate close for estate cleanouts; confirm the exact deadline with a local attorney. |
| When to escalate to a PCA | Order an ASTM E2018-aligned PCA for large, complex, or institutionally financed properties, or when capital planning data is required. |
| Ohanapropertyexperts | Provides documentation-ready cleanouts in Central Indiana including photo packs, signed reports, and haul manifests for sales, probate, and deposit recovery. |
Table of Contents
- How to document property condition post-cleanout: the room-by-room checklist
- Photographing and recording the property so your evidence actually holds up
- Building a removal manifest that proves what left the property
- Which documents to keep, who signs, and how records protect you
- When a formal property condition assessment makes more sense than a checklist
- Templates you can put to work right now
- What to do with your documentation in the hours, days, and weeks after a cleanout
- What we have learned from doing this work on the ground
- Ohanapropertyexperts delivers documentation-ready cleanouts in Central Indiana
- Sources
How to document property condition post-cleanout: the room-by-room checklist
A systematic room-by-room checklist is the backbone of any post-cleanout inspection. Without a consistent structure, it is easy to photograph the kitchen twice and forget the utility closet entirely. Follow the same room order every time: entry/foyer, living room, dining room, kitchen, each bedroom (numbered), each bathroom (numbered), laundry room, basement or crawl space, garage, and exterior access points. That sequence makes before-and-after comparisons direct and leaves no gaps.
What to capture for each room:
- Room identification: room name or number, date and time of inspection, inspector’s full name, and occupancy status at time of inspection.
- Condition rating: use three categories only: Good (no visible defects), Normal Wear (minor scuffs, faded paint, light carpet wear consistent with tenancy), and Damage (holes, stains, broken fixtures, missing hardware). Keeping to three categories prevents ambiguity.
- Specific defects: describe location (e.g., “north wall, 18 inches from floor”), approximate size in inches, and type (stain, hole, crack, missing, broken). Short, factual language holds up better than subjective descriptions.
- Walls: note paint condition, holes, scuffs, water stains, mold or mildew signs, and missing outlet covers.
- Floors: carpet staining, tears, or burns; hardwood scratches or gouges; tile cracks or missing grout; vinyl lifting.
- Ceilings: water stains, cracks, missing tiles, or smoke damage.
- Doors and windows: operation (opens/closes freely), lock function, screen condition, broken glass, and weatherstripping.
- Fixtures and appliances: note make, model, and serial number for each appliance; test operation where safe; record any missing knobs, broken seals, or non-functioning elements.
- HVAC vents and returns: visible dust buildup, damaged registers, filter condition if accessible.
- Visible plumbing: check under sinks for leaks or water damage; note faucet function, drain speed, and toilet operation.
- Smoke and CO detectors: present, functional (test button), and battery status.
- Electrical outlets and switches: test with a plug-in tester; note non-functioning outlets, missing cover plates, or visible scorch marks.
- Photo/video reference IDs: list the file names of photos taken in this room so the checklist and image files cross-reference each other.
Recording normal wear vs. chargeable damage is where most disputes start. Normal wear is the gradual, unavoidable deterioration from ordinary use: small nail holes from picture hanging, light carpet wear in traffic paths, faded paint after several years. Chargeable damage is beyond that: large holes, pet stains, broken fixtures, or burns. Write it plainly: “carpet stain, approximately 6 inches diameter, center of bedroom 2” beats “carpet looks bad.” Specificity is what makes a description defensible.
Pro Tip: Use a consistent unit for all measurements. Inches work well for interior defects. If you switch between inches and feet mid-checklist, comparisons become harder to read and easier to challenge.
A move-in/move-out condition report that separates move-in and move-out columns, uses the three condition categories, and includes a damage charge summary section gives you a ready-made structure to adapt for post-cleanout documentation.
Photographing and recording the property so your evidence actually holds up
Visual evidence is only as strong as its metadata. A photo without a verifiable timestamp is just a picture. Follow these steps to make every image and video file count.
-
Start wide, then close in. For each room, take one wide shot from the doorway showing the full space, one mid-distance shot of each wall, and close-up shots of every defect. Include a tape measure or a common object (a dollar bill, a pen) next to defects so scale is clear.
-
Keep location services on. Most smartphones embed GPS coordinates and a timestamp into the EXIF metadata of every photo. Do not edit or re-save the originals, because re-saving strips or overwrites that metadata. Export originals directly from your camera app.
-
Create a photo log. As you go, record each file name, the timestamp shown in the file, and a one-line caption (e.g., “Kitchen_sink_01 — rust stain on left basin, approx. 3 inches”). A simple spreadsheet works. This log becomes the index that ties your checklist entries to specific image files.
-
Shoot a continuous video walkthrough. Walk at chest height, move slowly, and narrate aloud: state the date, your name, the property address, the room you are entering, and any defects you see. Reference photo file names in your narration (“I am now photographing the item logged as Kitchen_sink_01”). A continuous, unedited video is far harder to dispute than a collection of still images.
-
Use a consistent file naming convention. A reliable format:
PropertyAddress_Unit_Date_Room_Item_SequenceNumber— for example,123Main_Unit2_2026-03-15_Kitchen_Sink_01. Consistent naming makes it easy to sort, search, and share files later. -
Export and back up originals immediately. Before you leave the property, upload original files to a cloud folder (Google Drive, Dropbox, or iCloud) and copy them to an external drive. Keep at least two independent copies. Export a PDF photo report with embedded images and captions for quick sharing with attorneys, realtors, or tenants.
-
Collect witness authentication when the stakes are high. If a tenant, estate representative, or co-owner is present during the walkthrough, ask them to send a brief email or text confirming they were present and that the photos accurately reflect the property’s condition. That message, with its automatic timestamp, adds a layer of third-party authentication that strengthens the record considerably.
Pro Tip: A timestamped, photo-backed condition assessment with signed acknowledgement converts a walkthrough into archived evidence. The single most common failure mode in deposit disputes is not bad photos — it is photos that cannot be tied to a specific date and property because the originals were edited or the log was never created.
Building a removal manifest that proves what left the property
A removal manifest is the chain-of-custody document for everything that was taken out of the property during the cleanout. For estate executors and landlords, it is often the difference between a clean probate filing and a contested one.
Every manifest entry should include:
- Item description: be specific (“oak dining table, 6 chairs” rather than “furniture”).
- Estimated quantity or weight: number of boxes, bags, or approximate pounds for bulk loads.
- Room of origin: where the item was located before removal.
- Condition at removal: Good, Damaged, or Non-functional.
- Final disposition: Donated, Recycled, Landfilled, or Sold — and the name of the recipient organization or contractor.
- Date of removal.
- Receipt or weight ticket reference number: cross-reference to the physical or digital receipt.
- Photo ID cross-reference: the file name of the photo showing the item before removal.
Haul receipts and weight tickets from your removal contractor prove that items left the property on a specific date and went to a specific destination. Donation receipts from organizations like Goodwill, Habitat for Humanity ReStores, or local charities serve double duty: they document disposition and may support charitable deduction records for estate tax purposes. Keep originals; scan and attach digital copies to the manifest.
Hazardous or regulated items need their own section. Batteries, paint cans, appliances containing refrigerant (refrigerators, window AC units), and fluorescent bulbs all have regulated disposal requirements. List these separately on the manifest and attach the contractor’s disposal certificate or the facility’s acceptance receipt. For appliance removal, a signed contractor manifest confirming EPA Section 608-compliant refrigerant recovery is the document you want. Ohanapropertyexperts handles appliance removal with proper disposal documentation included.
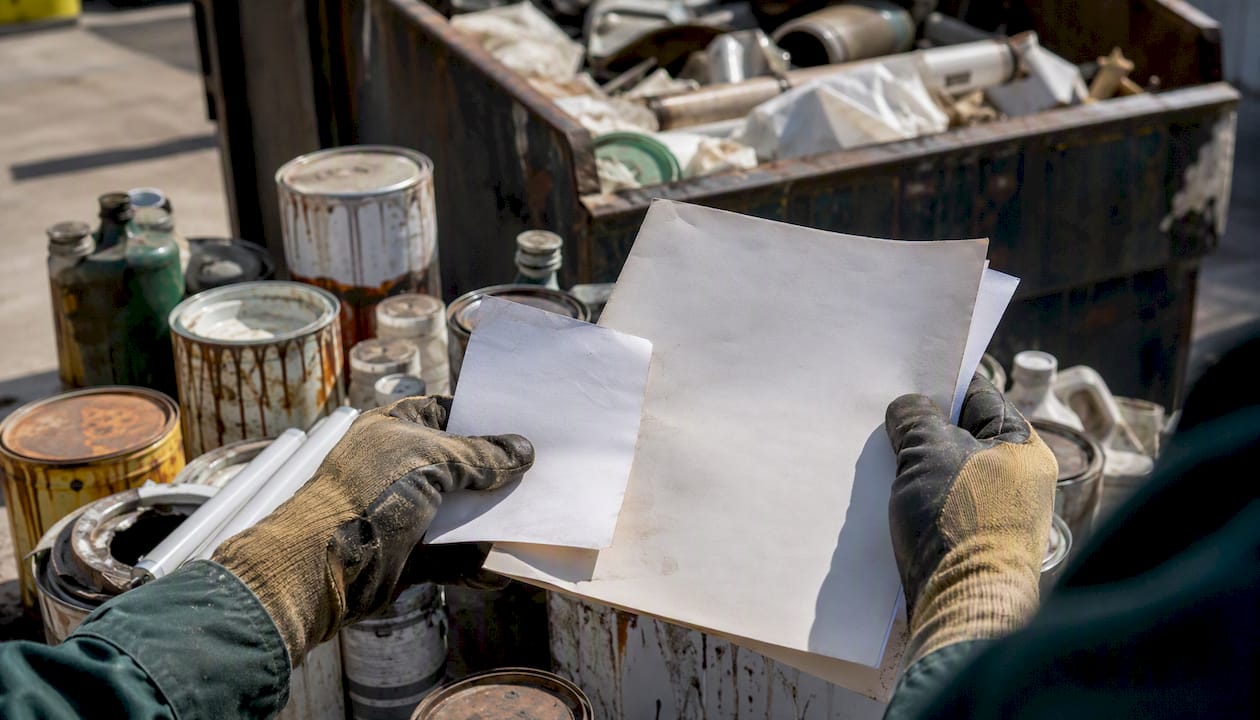
The practical workflow: during the final walkthrough, the inspector marks each removed item as “removed” on the manifest, notes the disposition, and obtains the contractor’s signature and haul receipt before leaving the site. Do not leave without those receipts. Tracking down a contractor two weeks later for a weight ticket is far harder than getting one on the day of the job.
Which documents to keep, who signs, and how records protect you
A complete post-cleanout record is not just photos and a checklist. The full document set that creates a defensible record includes:
- Signed condition report with inspector name, property owner or landlord name, and tenant or estate representative name (if present), each with printed name, date, and role.
- Dated photo and video files with preserved original metadata.
- Removal manifest with haul receipts, weight tickets, and donation receipts attached.
- Repair and cleaning invoices for any work done immediately after the cleanout.
- Keys and access inventory: count of keys returned or transferred, with signatures.
- Access log: a record of who entered the property and when, from the start of the cleanout through the final sign-off.
Who signs what: the inspector or property manager signs the condition report as the person who conducted the walkthrough. The property owner or landlord signs as the party responsible for the property. If a tenant or estate representative is present, their signature confirms they witnessed the condition. Each signature block should include printed name, date, and role. A report signed by only one party is weaker than one signed by two or three.
How documentation supports different outcomes:
- Sale: proof the property was delivered clean and clear, with no undisclosed items or debris remaining.
- Deposit disputes: a signed, dated condition report compared against the move-in baseline is the primary evidence in any security deposit hearing. Best practices call for completing the move-out inspection the day keys are returned and attaching receipts to any itemized deductions.
- Probate and estate administration: the removal manifest and donation receipts serve as the estate’s inventory and disposition record, supporting the executor’s accounting to the court.
- Insurance claims: pre-loss condition documentation (photos, condition report) establishes what the property looked like before damage occurred.
Keep a single property folder, digital and physical, with subfolders for Photos, Manifests, Invoices, and Signed Reports. Records should be kept for the lease term plus 3–6 years, or through probate close for estate cleanouts; confirm the exact deadline with a local attorney. An index document listing every file name, its location, and a one-line description takes 15 minutes to create and saves hours when you need to find something under pressure.
When a formal property condition assessment makes more sense than a checklist
A checklist-level post-cleanout inspection is right for most residential properties. A formal Property Condition Assessment (PCA) is a different tool, appropriate for different circumstances.
Order a PCA when any of these apply:
- The property is a large multifamily building, commercial asset, or complex mixed-use structure.
- You need capital planning data: estimated remaining service life and replacement cost projections for major systems.
- There are known or suspected structural issues, water intrusion, or deferred maintenance concerns.
- The transaction requires institutional due diligence (a lender, Fannie Mae, or Freddie Mac may require one).
- The record must support a high-stakes legal or financial decision, such as a contested estate or a commercial sale.
A PCA aligned with ASTM E2018 includes a walk-through survey, document review, interviews with property personnel, photographic documentation, and a Property Condition Report (PCR) with an executive summary and opinions of probable cost. Intertek’s PCA practice describes the PCR as covering observed deficiencies, recommendations, and cost opinions useful for both due diligence and long-term capital planning.
The ASTM E2018 standard is commonly referenced in institutional transactions and sets baseline scope and reporting expectations that help clients evaluate consultant qualifications. The PCR itself should include photographs, copies of material building department records, a clear purpose and scope statement, and documentation exhibits.
Questions to ask a PCA consultant before hiring:
- Are you following ASTM E2018 baseline protocols?
- What is your sampling approach for inaccessible areas?
- Will you provide opinions of probable cost and an executive summary?
- What are your professional qualifications and what limiting conditions apply?
| PCA Component | What It Delivers |
|---|---|
| Walk-through survey | Observable deficiencies across all accessible areas |
| Document review | Maintenance history, permits, and prior inspection records |
| Interviews | Operational context from property personnel or managers |
| Photographic documentation | Visual record of conditions tied to the narrative report |
| Property Condition Report (PCR) | Executive summary, deficiency list, and cost opinions |
For a single-family home or small rental unit coming out of a cleanout, a well-executed checklist inspection with photos and signed sign-off is usually sufficient. The PCA is the right call when the asset size, complexity, or transaction stakes justify the additional cost and scope.
Templates you can put to work right now
Having the right template before you walk through the door saves time and prevents gaps. Here is what to build or download before your post-cleanout inspection:
- Fillable room-by-room checklist (PDF or Google Form): one page per room, with fields for room name, date/time, inspector name, condition rating (Good / Normal Wear / Damage), defect description, and photo reference IDs. Google Forms works well because responses are automatically timestamped and stored in a linked spreadsheet.
- Signed condition report template: a one-to-two page document with a property address block, inspection date, summary of overall condition, a signature block for each party (inspector, owner, tenant/representative), and a field for any disputed items noted at signing.
- Removal manifest template: a spreadsheet with columns for item description, quantity/weight, room of origin, condition, final disposition, recipient/contractor, date, and receipt reference. Spreadsheet format lets you sort by room, disposition type, or date.
- Photo report (PDF with embedded images and captions): export your photo log as a PDF with each image, its file name, timestamp, and caption on the same page. Most cloud storage apps and PDF tools can generate this automatically.
Adapting templates for different audiences:
Landlords need deposit-related language: a field for “chargeable damage” with estimated repair cost, and a summary line showing the total deduction claimed against the deposit. Estate executors need inventory fields: item value estimate, beneficiary designation (if applicable), and disposition authorization. Homeowners preparing for sale need a simpler format focused on overall condition and any items disclosed to the buyer.
File format guidance: keep originals in uncompressed formats (RAW or full-resolution JPEG from your camera app, not re-saved or edited). Provide PDF versions for sign-off because PDFs preserve formatting across devices. Use a spreadsheet for the manifest so it stays sortable and filterable.
Combine the signed checklist, key photos (one per room plus close-ups of all defects), and haul receipts into a single PDF pack. That one file is what you send to an attorney, a realtor, or a tenant when they ask for documentation. It takes about 20 minutes to assemble and eliminates the back-and-forth of sharing individual files.
For landlords managing multiple units, consistent templates across every unit make portfolio-level comparisons straightforward. See how to manage multiple unit cleanouts efficiently for a workflow that scales the same documentation process across a full rental portfolio.
What to do with your documentation in the hours, days, and weeks after a cleanout
Finishing the cleanout is not the end of the process. Here is a prioritized timeline for what to do next.
-
Same day (within hours of completing the walkthrough): finalize the photo and video log, collect all haul receipts and contractor sign-offs, obtain all required signatures on the condition report, and upload original files to cloud storage and an external drive. Do not leave the property without receipts and signatures.
-
Days 1–7: produce the combined PDF report (checklist, key photos, haul receipts) and distribute it to all relevant stakeholders: attorney, estate executor, tenant, or listing agent. Schedule any repairs or follow-up inspections identified during the walkthrough. Confirm donation receipts have arrived from any charitable organizations.
-
Weeks 2–12: if recovering a security deposit, issue itemized deductions with supporting receipts within your state’s statutory deadline (commonly 14–30 days from move-out). If selling, provide the documentation pack to the buyer’s agent or attorney as part of the disclosure process. For estate matters, file the removal manifest and disposition records with the probate attorney.
-
Ongoing: keep all communication records (emails, texts, voicemails) that describe the handoff, sign-off, and any disputes. These records establish a timeline that supports your documentation if a dispute arises months later.
Priority order if you are short on time: signatures and receipts first, then photos and video, then the manifest and invoices. A signed report with receipts and no manifest is stronger than a perfect manifest with no signatures. Get the most legally binding elements secured before anything else.
For sellers, the pre-listing cleanout checklist walks through exactly which documentation deliverables help when listing a property and what buyers’ agents typically ask for.
What we have learned from doing this work on the ground
The paperwork side of a cleanout is where most people cut corners, and it is almost always the part they regret later.
The single most common mistake we see is incomplete room sequencing: someone photographs the kitchen, living room, and master bedroom, then stops because the property “looks clean.” Two months later, a tenant claims the second bathroom had pre-existing water damage. Without a photo of that bathroom taken the day of the cleanout, the dispute is a coin flip. Walk every room, every time, in the same order.
Unsigned reports are the second most common problem. A condition checklist that only the inspector signed is weaker than one signed by all parties. If a tenant or estate representative refuses to sign, note that refusal in writing on the form itself and have a witness initial it. That notation is itself documentation.
Never accept edited or re-saved images as originals. Always export and archive the original camera files directly from the device or app to preserve EXIF metadata. A photo re-saved through a messaging app or social media platform loses its timestamp and GPS data, which are the two elements that make it admissible as evidence.
A few other mistakes worth naming: failing to capture appliance serial numbers (critical for insurance claims and estate inventories), not narrating video walkthroughs (a silent video of a room proves far less than one where you state the date, address, and what you are looking at), and skipping the access log (if someone entered the property between the cleanout and the inspection, the record needs to show that).
The quick checklist we recommend before leaving any property: confirm vacancy, photograph every major system, generate the manifest, collect signatures, and upload files to the property folder before the end of the day. That sequence, done consistently, is what separates a defensible record from a pile of photos on someone’s phone.
Ohanapropertyexperts delivers documentation-ready cleanouts in Central Indiana
When you hire Ohanapropertyexperts for a full property cleanout or an estate cleanout, the documentation does not fall on you alone. Our crew captures room-by-room photos before and after removal, provides signed condition reports, generates haul manifests with receipts, routes eligible items to local donation partners, and packages everything into a single PDF report you can hand directly to your attorney, realtor, or tenant.
That means you leave the property with a complete, organized record, not a folder of unsorted photos and a verbal promise. For estate executors managing inherited properties, that documentation pack supports probate filings and executor accounting. For landlords, it backs up every line of an itemized deposit deduction. For sellers, it gives the listing agent something concrete to show buyers.
When you request a free estimate, ask specifically for a documentation-ready cleanout: photo pack, signed checklist, and haul manifests. We serve Columbus, Seymour, Indianapolis, Greenwood, Franklin, and surrounding Central Indiana communities. Call (812) 302-6833 or visit Ohanapropertyexperts to schedule your cleanout and get a complete property record from day one.
Sources
- Standard Guide for Property Condition Assessments: Baseline Property Condition Assessment Process (E2018-24)
- Move-in/move-out facility condition assessment checklist (OxMaint)
- Move-In / Move-Out condition report (Pivot PDF)
- How to document a move-out inspection to protect your security deposit
Recommended
- The Role of Cleanout in Property Maintenance | Ohana Property Services
- Property Cleanout Benefits Home Sales: Seller’s Guide | Ohana Property Services
- How to Recommend Cleanout Services to Clients | Ohana Property Services
- Cleanout Service Agreements Explained for Property Owners | Ohana Property Services