
Debris Types in Flip Properties: A Flipper's Field Guide
Discover the six essential types of debris found in flip properties and learn how to handle each for a successful renovation.
Debris Types in Flip Properties: A Flipper’s Field Guide
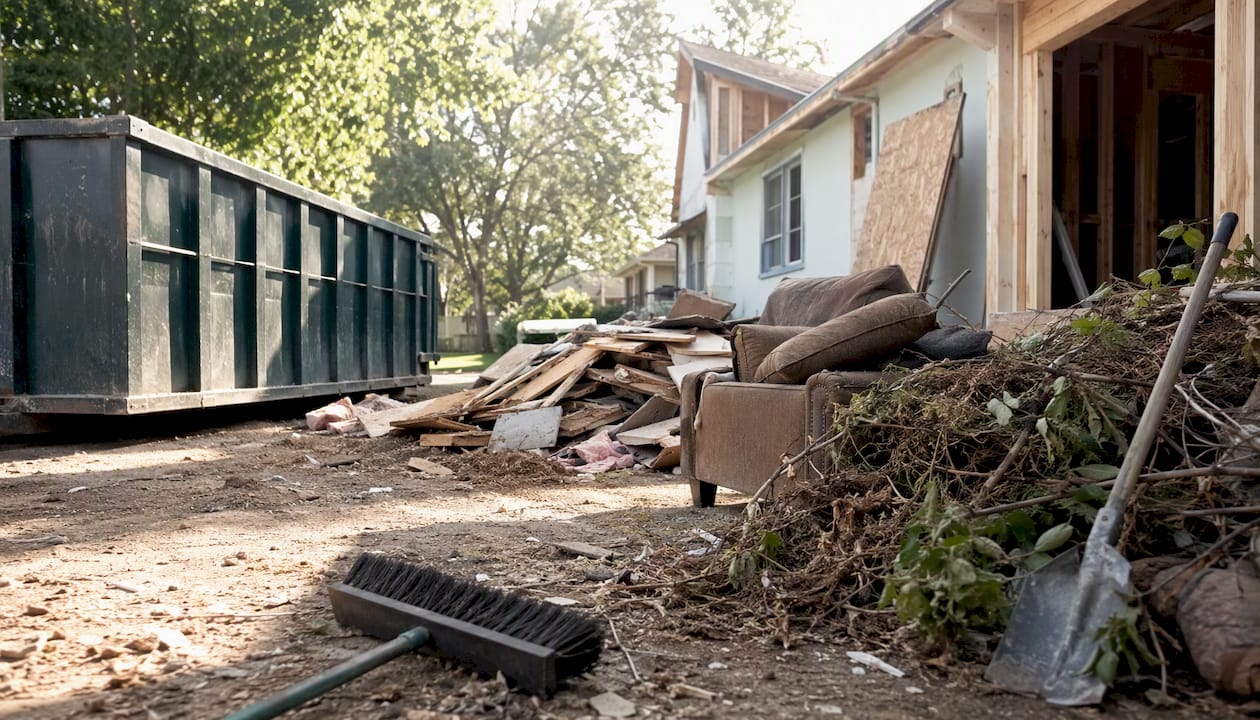
Most flip properties contain six core categories of debris: household junk, construction and demolition (C&D) materials, yard and vegetative waste, bulk items and white goods, hazardous household waste, and hidden or soiled materials discovered during demo. Your immediate next step after acquiring a property is to walk every room, photograph what you find, and sort what you see into those categories before you call a hauler or order a dumpster.
Here is a quick read on which categories typically need a professional versus which you can handle yourself:
- Hire a pro: Hazardous materials (asbestos, lead paint residues, refrigerant-containing appliances, solvents), large C&D volumes, and anything requiring a disposal manifest or certified handling.
- DIY-friendly: Small household junk, bagged trash, light yard debris, and furniture you can safely carry without disconnecting utilities or disturbing building materials.
Getting this sorted on day one protects your budget, your contractors, and your timeline.
Key Takeaways
Sorting debris by category before you call a hauler is the single most effective way to control cleanout costs and keep your flip on schedule.
| Point | Details |
|---|---|
| Six core debris categories | Household junk, C&D materials, yard waste, white goods, hazardous waste, and hidden/soiled debris are the types you will encounter on most flips. |
| Segregate on day one | Sorting trash, C&D, salvage, and hazardous items into separate zones from the start reduces landfill costs and prevents disposal facility rejections. |
| Hazardous materials require certified handling | Asbestos, refrigerant appliances, and HHW cannot go in a standard dumpster and must be handled by licensed contractors or certified programs. |
| Document everything | Timestamped photos, weight tickets, and disposal receipts protect your budget accounting and satisfy permit and investor reporting requirements. |
| Ohanapropertyexperts for Central Indiana flips | Photo-based quotes, full cleanouts, appliance removal, and donation routing keep your rehab on schedule across Columbus and surrounding communities. |
Table of Contents
- What “debris” actually means on a flip property
- Common types of debris in flip properties, with handling notes
- What you should not remove without approval
- Where different debris types actually go
- Tools, equipment, and PPE for safe debris removal
- Step-by-step debris removal workflow for a flip
- Cost drivers and realistic timelines for flip cleanouts
- When to DIY debris removal and when to hire a pro
- What a professional flip cleanout actually looks like: Ohana’s field checklist
- Field perspective: surprises that cost flippers the most
- Ohanapropertyexperts handles flip cleanouts in Central Indiana
- Authoritative resources for disposal rules and local options
- Sources
What “debris” actually means on a flip property
For disposal rules and cleanout bidding, debris on a flip property means any material left behind after occupancy, demolition, or damage. That includes building materials, household contents, vegetative matter, appliances, and disturbed soils. FEMA’s guidance on private property debris removal identifies the main categories as vegetative debris, C&D materials, sand, mud, silt, gravel, rocks, white goods (large appliances), and vehicle wreckage.
The practical definition for flippers: If it was left in or on the property and you need to move it before contractors can work or buyers can walk through, it is debris — regardless of whether it came from the previous owner’s kitchen or your own demo crew.
The definition matters for three reasons. First, disposal facilities have different acceptance rules for each category. Second, some materials trigger permitting or certified-handling requirements. Third, cleanout bids are scoped by category, so a hauler quoting “household junk only” will not automatically take your drywall or your refrigerator. Knowing the categories before you call anyone saves you from surprise add-on charges and scheduling gaps.
Common types of debris in flip properties, with handling notes
Demolition and renovation waste falls under C&D debris in EPA-style frameworks, but a real flip property usually holds several distinct categories at once. Here is what you will typically find, along with practical handling guidance for each.
-
Household junk and trash: Bagged garbage, food waste, clothing, small furniture, personal items left by previous occupants. Goes to the municipal landfill. Generally DIY-friendly for small volumes; hire a crew for full-house trash-outs.
-
Construction and demolition (C&D) debris: Drywall, flooring (tile, hardwood, carpet), cabinets, roofing shingles, lumber, concrete block, and metal framing. This is the heaviest category by volume on most flips. Large volumes require a dedicated dumpster and often a C&D recycler rather than a standard landfill. Hire a pro for anything beyond a single room’s worth.
-
Yard and vegetative debris: Branches, stumps, leaves, overgrown shrubs, and grass clippings. Many municipalities accept vegetative debris separately for composting or chipping. DIY for light yard cleanup; hire equipment for stump grinding or large tree removal.
-
Bulk items and white goods: Sofas, mattresses, refrigerators, washers, dryers, and dishwashers. Appliances with refrigerant (refrigerators, window AC units) require certified removal under EPA regulations. Mattresses carry disposal surcharges at most landfills. Hire a pro for disconnection and hauling.
-
Hazardous household waste (HHW): Paint cans, solvents, pesticides, batteries, fluorescent bulbs, and motor oil. These cannot go in a standard dumpster. Route to a local HHW collection program. Always hire a certified contractor for asbestos-containing materials (floor tiles, pipe insulation, popcorn ceilings in pre-1980 homes) and lead paint disturbance.
-
Soils, gravel, and land-clearing debris: Excavated soil, gravel, concrete rubble, and fill material from exterior work. Heavy and expensive to haul. Separate from other debris streams; some C&D recyclers accept clean concrete and asphalt for crushing.
-
Concealed and soiled debris: Moldy insulation behind walls, water-damaged subfloor layers, hoarded materials under floors, and trash sealed inside wall cavities. These are the biggest source of scope creep on flip projects. You will not know the full volume until demo begins, so budget a contingency. Always hire a pro when mold or biological contamination is present.
Investor guidance consistently recommends separating your initial trash-out from your demo-phase debris removal — you will likely need a separate dumpster for household junk versus C&D materials.
What you should not remove without approval
Some materials look like debris but carry legal, regulatory, or safety restrictions that can create real liability if you remove them without the right process.
Rule of thumb: When you are unsure whether something is yours to remove, photograph it, log it, and pause. The cost of a phone call to an attorney or a certified inspector is far less than the cost of a regulatory violation or a tenant dispute.
Tenant personal property: If the previous occupant has not formally vacated, their belongings may still be legally theirs. Most states require a formal eviction and notice process before you can dispose of personal property. Document everything with timestamped photos and keep records of all communications.
Asbestos-containing materials (ACMs): Pre-1980 homes commonly contain asbestos in floor tiles, pipe insulation, roofing felt, and textured ceilings. C&D debris from demolition and renovation can contain hazardous materials that require certified handling, including asbestos abatement by a licensed contractor. Do not disturb suspected ACMs without a professional inspection first.
Refrigerant-containing appliances: Refrigerators, freezers, window AC units, and dehumidifiers contain refrigerants regulated under Section 608 of the Clean Air Act. Removal requires a certified technician to recover the refrigerant before the appliance is scrapped or hauled.
Items under probate or litigation: If the property is part of an estate or a foreclosure with active legal proceedings, certain contents may be subject to court orders. Consult the estate attorney or title company before removing anything of potential value.
Utility fixtures requiring permits: Electrical panels, gas lines, and plumbing rough-ins may need a licensed contractor and a permit before removal or capping. Pulling these without permits can delay your final inspection and closing.
Where different debris types actually go
Sorting on-site from day one is the single most effective way to reduce your net haul cost. Metal salvage, donation routing, and C&D recycling can all offset landfill fees when managed from the start.
- C&D debris: Route clean concrete, asphalt, and metal to a C&D recycler. Mixed C&D (drywall, wood, roofing) typically goes to a permitted C&D landfill. Check local facilities for acceptance rules before scheduling a haul.
- Municipal solid waste (household junk, trash): Standard landfill or transfer station. Call ahead to confirm they accept bulk loads.
- Hazardous household waste: Local HHW collection programs, often run by the county or municipality. Many accept paint, solvents, batteries, and fluorescent bulbs at no charge on scheduled collection days.
- White goods and appliances: Metal salvage yards often pay for scrap appliances. Refrigerant-containing units must have refrigerant recovered first. Some municipalities offer bulk pickup for large appliances.
- Donation-eligible items: Furniture, cabinets, fixtures, and building materials in good condition can go to Habitat for Humanity ReStores or similar organizations. Get a written donation receipt for tax purposes.
- Vegetative debris: Many municipalities accept yard waste separately for composting. Check your local public works department for drop-off sites or scheduled pickup.
FEMA recommends contacting local authorities and disposal facilities for rules on vegetative debris and large appliances and advises keeping receipts for all removal from private property. For a deeper look at your debris removal options, local facility rules vary enough that a quick call before you haul is always worth it.
Tools, equipment, and PPE for safe debris removal
The right equipment makes the difference between a one-day cleanout and a three-day ordeal. Here is what a typical flip cleanout requires.
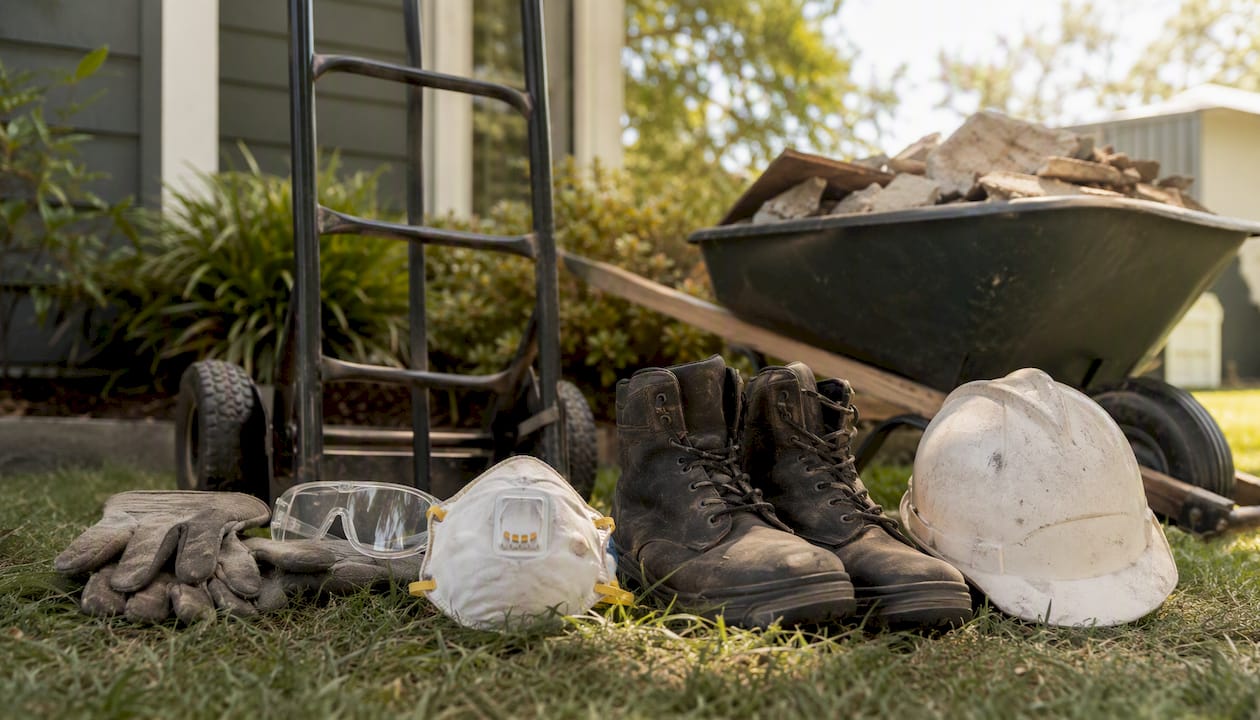
Equipment: Roll-off dumpsters (10-yard for small jobs, 20- or 30-yard for demo-phase C&D), flatbed or box trucks for appliances and bulk items, hand trucks and dollies, wheelbarrows, shop vacs for fine debris and dust, and sometimes a skid steer or mini-excavator for exterior land clearing.
PPE essentials: Heavy-duty work gloves, ANSI-rated safety glasses, N95 or P100 respirators (upgrade to a half-face respirator with P100 cartridges when disturbing old insulation or suspected ACMs), steel-toe boots, and hard hats when overhead demo is active. If testing confirms asbestos or lead, only certified abatement contractors with the appropriate supplied-air or full-face respirators should enter the work zone.
Pro Tip: Stage a sorting station near the dumpster on day one: one area for trash, one for salvage/donation, one for C&D. Keeping these streams physically separate from the start prevents cross-contamination and saves time at the disposal facility. Label each area clearly so every crew member uses the same system.
Effective debris management improves site safety and keeps contractors on schedule, which directly supports faster project completion and better listing photos.
Step-by-step debris removal workflow for a flip
A clean, ordered process prevents the two most common flip cleanout failures: missing hazardous materials and losing disposal documentation.
-
Initial walk-through and photo documentation. Walk every room, the attic, the basement, and the exterior. Photograph all debris in place before anything moves. Note suspected hazardous materials, tenant property, and structural concerns.
-
Identify and pause on regulated or owned items. Flag asbestos suspects, refrigerant appliances, and any personal property that may not be yours to remove. Do not disturb flagged items until you have a professional assessment or legal clearance.
-
Estimate volume and equipment needs. Count rooms, estimate cubic yards, and identify any access constraints (narrow doorways, stairs, no alley access). Order dumpsters sized to your estimate, and plan for a separate container for C&D if you are doing demo.
-
Segregate materials on-site. Set up sorting zones for trash, C&D, salvage/donation, and hazardous materials before removal begins. Planning your waste-removal strategy ahead of demo prevents jobsite congestion and schedule delays.
-
Remove salvageable and donatable items first. Pull reusable cabinets, fixtures, and furniture before demo begins. This protects items from damage and gets donation receipts in hand early.
-
Load and haul C&D and trash to proper facilities. Follow the disposal paths mapped in the previous section. Keep your dumpster rotation on schedule so contractors are never blocked.
-
Final site sweep and staging for rehab. Once debris is cleared, do a final walk to confirm no materials remain that would interfere with contractors. Sweep or blow out dust from demo areas.
-
Store disposal receipts and weight tickets. File all receipts by date and material type. These records support your budget accounting, protect you in disputes, and may be required for permits or investor reporting.
Documentation checklist:
- Timestamped before-and-after photos
- Appliance serial numbers and refrigerant recovery certificates
- Disposal facility receipts and weight tickets
- Donation receipts from charitable organizations
- Any asbestos or lead inspection reports
Cost drivers and realistic timelines for flip cleanouts
Price and schedule on a flip cleanout are driven by volume, material type, and access, not by the square footage of the house alone.
Primary cost drivers:
- Volume of material: The single biggest variable. A lightly furnished property might fill one 10-yard dumpster. A neglected or hoarded property can require multiple 30-yard containers and several haul cycles.
- Hazardous materials: Asbestos abatement and lead paint remediation add certified contractor costs and testing fees on top of standard haul rates.
- Appliance and bulky-item removal: Refrigerant recovery, mattress disposal surcharges, and the labor to move heavy items up or down stairs all add to the base price.
- Access and logistics: Narrow streets, no alley access, multiple flights of stairs, or a basement with a low ceiling all slow labor and can require smaller equipment at higher cost.
- Disposal surcharges: Tires, mattresses, and HHW carry per-item surcharges at most facilities. Budget for these separately.
Timelines: A small cosmetic cleanout on a lightly occupied property typically takes one day. A full trash-out plus demo-phase C&D removal on a neglected property can run several days to a couple of weeks, depending on volume and whether hazardous material testing or permitting adds waiting time.
Investor guidance on foreclosure flip cleanouts makes the variability clear: what looks like a modest cleanout budget can multiply quickly when a property contains furniture, appliances, and demo-level C&D that require additional dumpsters and haul cycles. For a detailed breakdown of what drives flip property junk removal costs, planning your estimate by category rather than by room count gives you a much more accurate number.
When to DIY debris removal and when to hire a pro
The honest framework is this: DIY saves money on small, straightforward jobs. It costs money on anything involving hazardous materials, heavy lifts, regulatory compliance, or contractor schedule pressure.
DIY makes sense when the property has light household junk, no suspected hazardous materials, easy ground-floor access, and you have the time and a truck. Bagging trash, hauling a few boxes to donation, and clearing light yard debris are all reasonable self-managed tasks.
Hire a professional when any of these apply:
- Suspected asbestos, lead paint, or mold
- Appliances with refrigerant that need certified recovery
- Large C&D volumes from demo (more than one room’s worth)
- Stairs, tight access, or heavy items that create injury risk
- You need the property cleared fast to keep contractors on schedule
- You need disposal documentation for permits or investor records
Debris management directly affects how fast contractors can move and how the property presents at listing. Losing a week because the cleanout ran long costs more in holding expenses than a professional crew would have charged. For a practical look at common junk removal mistakes house flippers make, the pattern is almost always the same: underestimating volume and skipping the hazardous-materials check.
What a professional flip cleanout actually looks like: Ohana’s field checklist
A well-run professional cleanout follows a documented process, not just a “load and go” approach. Here is what a thorough pro crew does on a flip property:
- Pre-job photos and written inventory: Every room photographed before anything moves. Suspected valuables or regulated items flagged and logged.
- Locked-box protocol for valuables: Any items of potential value (jewelry, documents, collectibles) are secured and reported to the property owner before disposal.
- Segregate donations and recyclables first: Reusable furniture, working appliances, and salvageable building materials are pulled before demo debris is loaded.
- Appliance and furniture removal with documentation: Serial numbers logged, refrigerant recovery certificates obtained, and donation receipts collected.
- C&D staging and dumpster management: Separate containers for household junk and C&D debris, rotated on a schedule that keeps the jobsite clear.
- Disposal receipts and weight tickets: Filed by date and material type, handed to the property owner or investor at job completion.
- Final sweep and basic sanitation: Floors swept or blown out, no debris left that would slow contractors.
- Donation routing and receipts: Usable items routed to local organizations with written receipts for the property owner’s tax records.
Pro Tip: Timestamped photos taken before and after each load protect you in two ways: they document what was removed (useful for investor accounting) and they confirm the condition of the property at the time of removal, which reduces disputes with contractors, tenants, or estate parties.
For a printable version of this process, the construction debris removal checklist for flippers covers the demo-phase steps in detail.
Field perspective: surprises that cost flippers the most
The cleanouts that blow budgets almost always share one trait: the scope was estimated from the surface, not from a real walk-through.
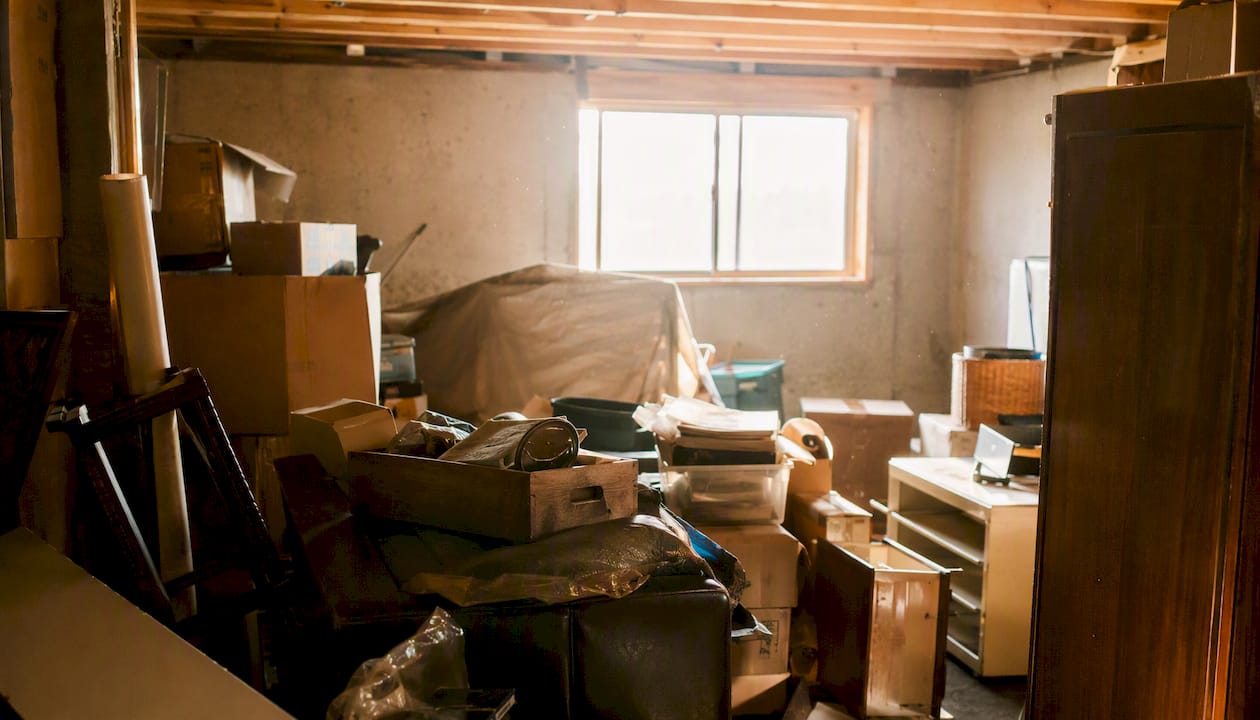
Hidden mattresses and hoarded materials are more common than most investors expect. A property that looks like a light cleanout from the front door can have a basement packed floor-to-ceiling with furniture, or a garage full of tires and paint cans. The fix is simple: open every door, every closet, and every outbuilding before you commit to a price or a timeline.
Concealed structural damage revealed during demo is the other major surprise. Water-damaged subfloor layers, moldy insulation behind bathroom walls, and trash sealed inside wall cavities all add unplanned debris volume and, sometimes, hazardous material handling requirements. Budget a contingency on any property that shows signs of water intrusion or deferred maintenance.
Tenant property disputes slow cleanouts more than almost anything else. If there is any ambiguity about whether the previous occupant has formally vacated, photograph everything before you touch it and get legal confirmation before disposal. One disputed item can freeze a cleanout for days.
Unexpected hazardous materials are the most expensive surprise of all. A popcorn ceiling in a pre-1980 home, floor tiles that look like standard vinyl, or pipe insulation in the basement can all contain asbestos. The practical tip: if the property was built before 1980, budget for a professional inspection before demo begins. The inspection cost is small compared to the abatement cost if you disturb ACMs without knowing.
Finally, prioritize safety-related removals before anything else. Clear debris that blocks egress, covers electrical panels, or creates trip hazards for your crew before you start sorting for donation or recycling. A safe jobsite keeps contractors productive and keeps your project on schedule.
Ohanapropertyexperts handles flip cleanouts in Central Indiana
Flip timelines are tight, and a cleanout that drags into week two costs you in holding expenses and contractor delays. Ohanapropertyexperts gives real estate investors and agents in Central Indiana a faster path: photo-based quotes so you know the price before anyone shows up, full property cleanouts that cover household junk, C&D debris, appliances, and yard waste in a single coordinated job, and donation routing that gets usable items to local organizations with receipts for your records.
We serve Columbus, Seymour, North Vernon, Edinburgh, Franklin, Greenwood, Indianapolis, Lafayette, and surrounding communities. Whether you need a full property cleanout before demo begins or targeted debris removal after contractors finish, we work around your rehab schedule. Call us at (812) 302-6833 or visit our services page to get a free photo-based quote today.
Authoritative resources for disposal rules and local options
Use these sources to verify disposal requirements and find local HHW or C&D recycling facilities before you schedule a haul.
- FEMA: Tips for Removing Debris from Your Private Property: Defines the main debris categories and recommends contacting local authorities for disposal rules. A useful starting point for understanding what counts as debris and what documentation to keep.
- ATI Restoration: Debris Removal: Explains how C&D debris is classified and why hazardous materials within demo waste require certified handling. Helpful when scoping a demo-phase cleanout.
- Foreclosure Flips: Cleanout Costs Investors Forget: Investor-focused guidance on how cleanout budgets can expand when volume and material type are underestimated. Read before you bid a foreclosure or neglected property.
- Creamapi: Waste Removal Planning for Fix-and-Flip Renovations: Covers dumpster staging, demo-phase planning, and how to prevent contractor slowdowns from debris buildup.
- Thepunthought: Explains how debris management affects site safety, contractor productivity, and final listing presentation.
- Your local municipal public works department: Check for HHW collection schedules, vegetative debris drop-off sites, and C&D recycling facilities in your county. Rules vary significantly by jurisdiction, so call before you haul.
- Your state environmental agency: For asbestos notification requirements, lead paint regulations, and permitted disposal facilities, your state EPA office is the authoritative source for your specific market.
Sources
- Tips for removing debris from your private property | FEMA
- Debris Removal | ATI Restoration
- Cleanout Costs Investors Forget on Foreclosure Flips - Foreclosure Flips
- Waste Removal Planning for Fix-and-Flip Renovations - Creamapi
- Thepunthought
Recommended
- Construction Debris Removal Checklist for Flippers | Ohana Property Services
- Flip Property Cleanout: What Investors Need to Know | Ohana Property Services
- Junk Removal Mistakes House Flippers Must Avoid | Ohana Property Services
- Hazardous Material Removal on a Flip: What You Need to Know | Ohana Property Services